Showing posts with label studio. Show all posts

Sunday, 27 April 2014

FMP - Studio Setting Practice

For these images I decided to experiment with a couple of light set ups at my aunties house. I created a one light and two light setup. Examples are shown below;

One Light Setup; (Use of an umbrella)

Two Light Setup; (Two umbrellas)


Monday, 28 October 2013

Baby Shoot - Rubie

Within this shoot, I have photographed my neighbours little baby and her older brother within their home environment. I have used the available lighting with one umbrella light which I bounced off the ceiling. I feel that it was successful for my first shoot at home. 


Thursday, 17 October 2013

Video Portfolio

Portfolio


This is a selection of portraits that I have took which I have created into a portfolio. I used iMovie which was relatively simple and I feel that the portfolio was successful. 


Friday, 4 October 2013

Hollywood Lighting

Hollywood Lighting

After the 1930's this type of photography used hard lighting therefore the actors and actresses had to be beautiful and good looking due to the harsh lighting. The brows of a face needs to be lit well as well as capturing some shadows of the eye lashes for a female. When photographing a women you need to use diffused lighting. As well as the main light a fill light can be used.

Film Noir;

This particular lighting started by telling a story to the viewers. It is generally set up within a studio setting rather than the actors homes. The lighting used is created so that it looks natural, most of the time two lights will be used which are hard lights. If a light is being used for the back of the subject it needs to be reduced so it isn't as powerful as the one in the foreground.

Research; 

James Cagney; I have looked at this actor and his particular appearance. He comes across as one of the lads in a gang due to the relaxed posture and his facial expressions.  He is the type of guy that gets his way. I feel that his expression and the lighting helps to present this. The right hand side image looks a really aggressive facial expression towards the camera.


 Errol Flynn; Within this image, it presents a heroic person as he is looking away from the camera as if he has something better to look at. The camera angle is also slightly looking up towards the subject rather than being straight on at the same level as him.


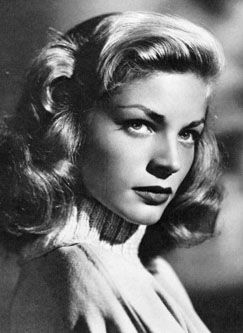
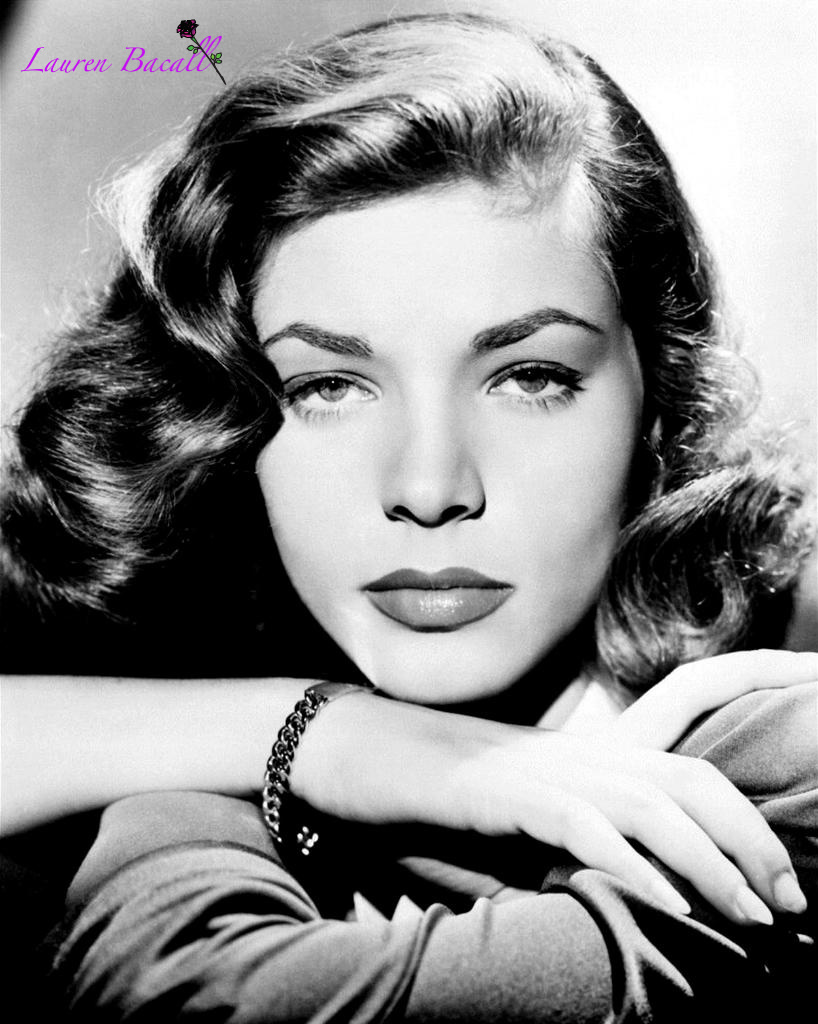
Lauren Bacall; I feel that she looks devious and seductive due to her facial expressions especially in the second image. The way she looks makes you think that she will have a man eating out of the palm of her hands. I have researched more poses within this actress to explore how the subject presents themselves. The lighting within the images really helps to emphasize the subjects beauty.


 Audrey Hepburn; When I look at these images, the subject looks really innocent due to her beautiful wide eyes. Within the right hand image, the photographer has been able to capture the shadow of her eye lashes which helps to emphasize the beauty.


 Common stylist techniques throughout these actors/actresses photographs are the hard lighting used to create shadows within certain parts of the face. The majority of the lighting is really dim due to the characteristics of the technique. Another common technique is capturing high lighting ratios. The subjects also tend to look away from the camera suggesting that they have something better to look at. The camera angle is also shot from a lower angle than them which shows a more of an importance.


Test Shots;

Before heading into the studio, I needed to experiment so that I could get the correct framing of the subject. I found that to get the correct angle and positioning of the subject was hard to begin with but within the studio I was able to do it. In the end I used a chair within the studio where the subject was able to lean on and create the pose needed. I asked my model to cross her arms, lean her head onto her arm and make sure her face was square onto the camera.

Test Shot;


Lighting Setup

My studio setup contained two lights which was a snoot and a main light. I used the main light in the front of the subject to light their face from quite high looking down. I then placed a snoot behind the subject to the right hand side which was also quite high, this light was a hair light therefore used to capture the detail within the models hair. Within this shoot, I had to get the model and the camera into position and then sort the lighting out.

This was the image that I took within the studio. I then had to alter it within photoshop. Within photoshop, I created a black and white adjustment layer, cropping, altered the brightness and contrast, burnt some of the background in, removed some skin blemishes and darkened her lips. I felt that I needed to make these changes so that it looked more like the image I was replicating. 


Replicate of Lauren Bacall

The right image above is my final image which I was able to replicate within the studio using the film noir style lighting after editing. The settings that I used for this shoot were;
ISO - 200
Shutter Speed - 1/160
Aperture - F13

After recieving feedback off peers, I decided to re-edit the image. I feel that this helped the final appearance of the image as I had gained more experience and knowledge of how to edit portraits, especially with the skin tone.
This is my final image of the Hollywood Lighting Workshop.


Evaluation;

I feel that this shoot was really successful and that I was able to create a image that I was aiming for. The lighting I used worked to create the effect I needed and I feel the post production helped to finish the image to the stage it needed to be. I am happy with the final image and I feel that it went really well, this could be due to the preparation I completed beforehand. I would like to experiment more with this technique.


Thursday, 3 October 2013

High Speed Water Droplets

My Photographs

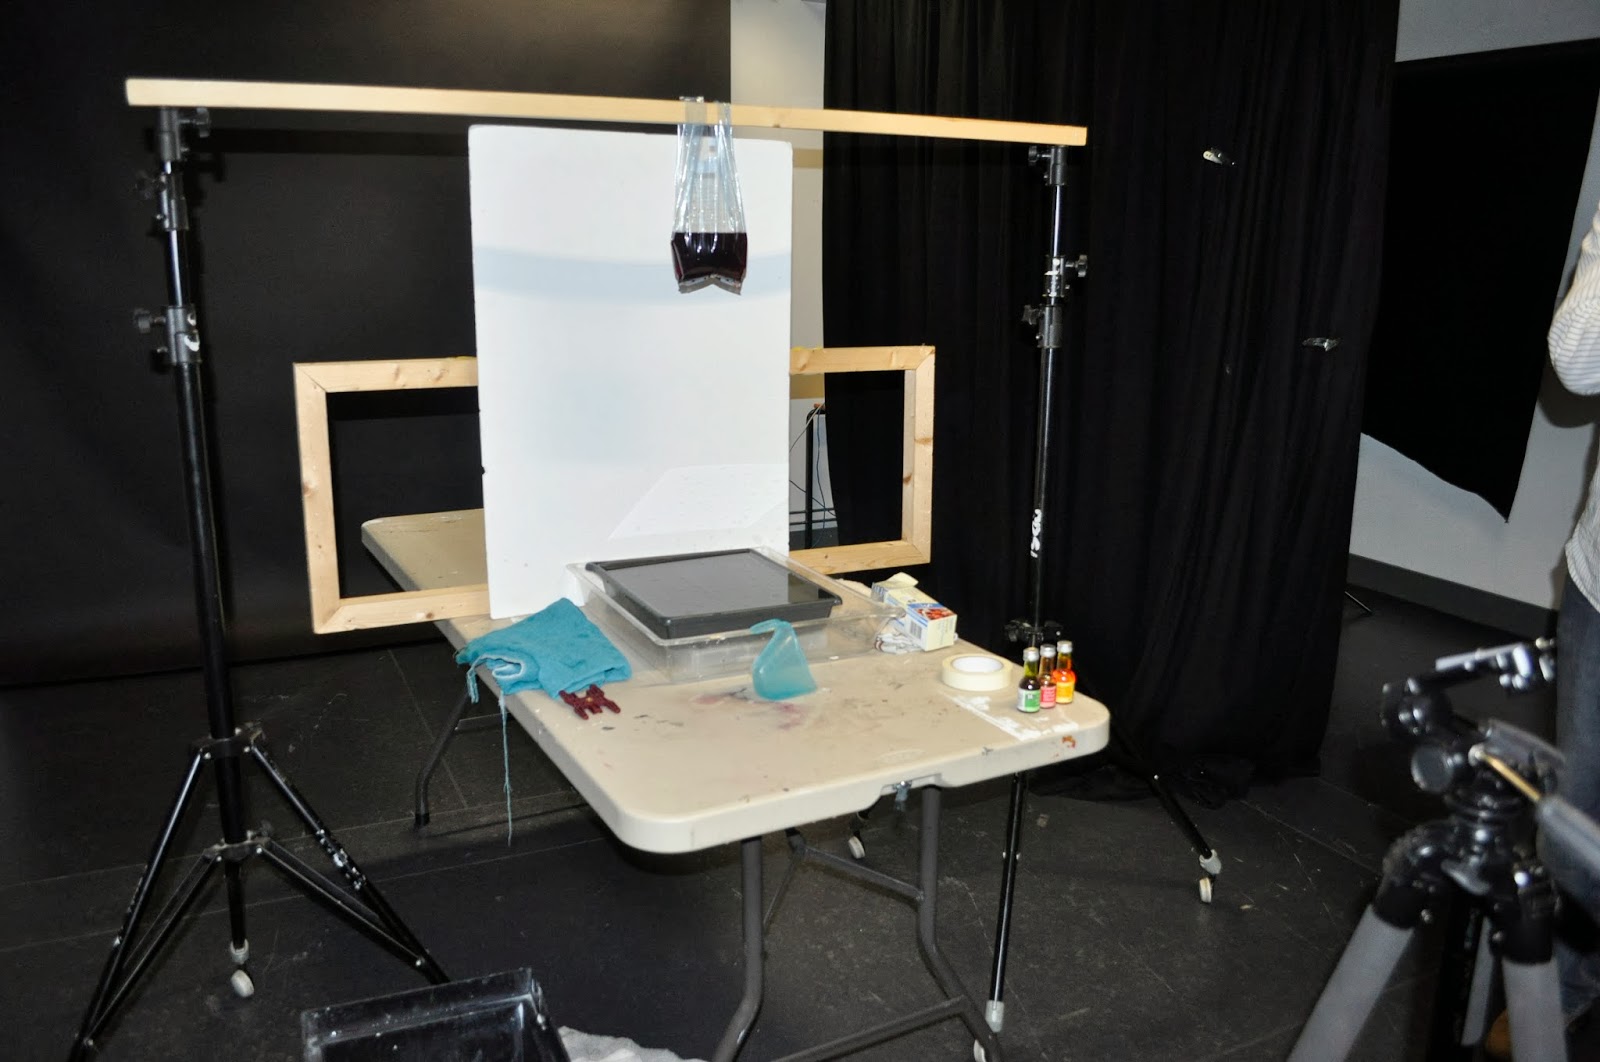
These are a selection of my images which our group was able to produce within the studio during the high speed water droplets shoot. The equipment used is as follows; the freezer bag was used to hold the liquid in which was hung on the pole above the tray of water. We created a small hole at the bottom of the bag to allow the liquid to drip out. 
We used a tripod which was positioned so that it was as close as it could be to the water drop so that it would focus. We used tape to stick the paper behind the tray and if we needed to cover the hole up if it came out too quickly. 
The flash gun was off camera using a hot shoe attachment. We positioned it so that it pointed towards the backdrop so that it reflected back. We needed to prop it up higher so we put it on a box. A trigger is another useful thing to use so that you don't knock the camera as it captures the movement. 

Camera Settings;

ISO - 100
F-Stop - 16
Shutter Speed - 1/250
White Balance - Flash

The ETTL setting on the flash gun works by creating a pre-flash that will automatically measure the light and work out the power for the next flash. If you don't have this setting you need to work it out yourself.


Evaluation;

I feel that this experiment was extremely successful and that our group was able to create some brilliant shots. I have edited the images slightly by cropping them and altering the brightness and contrast. For one of the images I used a preset to change the milk image to another colour. 
Once we had worked the timing of capturing the right movement we were able to experiment more which advanced our images. To begin with, we had quite a few images that missed the droplet either before or after. 
When editing my images I have experimented with the framing of how I cropped them to see the appearance of them. The majority of the images are central but I have tried to off centre them as well. None of my droplets are the same as it is impossible to capture it again after creating it once, it's like a snowflake. 

If I was to try this technique again I would create my own backgrounds on Photoshop rather than using the pre-made ones so that I could choose the colours. 
The session was really successful, with one problem which was if we were to move the camera we would have to refocus the camera which was a hard task. 

I'm not entirely sure which image I prefer because the colourful images are strong and lead the viewer into the image due to the vibrant colours; however, the black and white images contain nice contrast. I asked peers which they preferred and they said that the colourful images were strong and liked how the colours blurred as ripples were created within the waters movement. 

High Speed Water Droplets

Research;


These images are an example of Dr Harold Edgerton where he uses high speed shots. He was able to produce flash durations of 1/100,000 (1 millionth) of a second. I am aiming to capture the crown and where the water droplet travels out of the liquid.
http://edgerton-digital-collections.org/

Martin Waugh

http://www.liquidsculpture.com/fine_art/water-drop-photo.htm?title=AmberOrb

Set Up;


Equipment;
  • Speed Light
  • Food Colouring 
  • Trays
  • Table
  • Patterned Paper
  • Shutter Release Cable or Remote
  • Freezer Bags with Handles
  • Frame to attach the bag of liquid to, above the tray
  • Sellotape (in case you need to cover the hole)
  • Camera
  • Tripod  
  • Milk
  • Water
  • Pin
  • Towels
  • Torch
  • Zoom Lens 

Information;

During this shoot, it is an experimental process until you get to grips with when to capture the droplets. You are aiming to create the different effects by how the water splashes.
It is important to understand that it isn't the camera shutter speed that freezes the water droplet movement, it is the flash duration that does the work.
It is easy enough to replicate at home.

How to;

  1. Set up the equipment in a suitable area
  2. Fill the bag up with water and make a small hole in the bottom
  3. Set your camera to auto focus and place a pen where the water drops. When it is focused change it to manual
  4. Set up the speed light (wireless or cable) facing towards the card behind the water tray. If you have the ETTL setting this should be activated
  5. Experiment with milk, coloured paper, perspex, water
  6. Use the shutter release to begin shooting