My Photographs
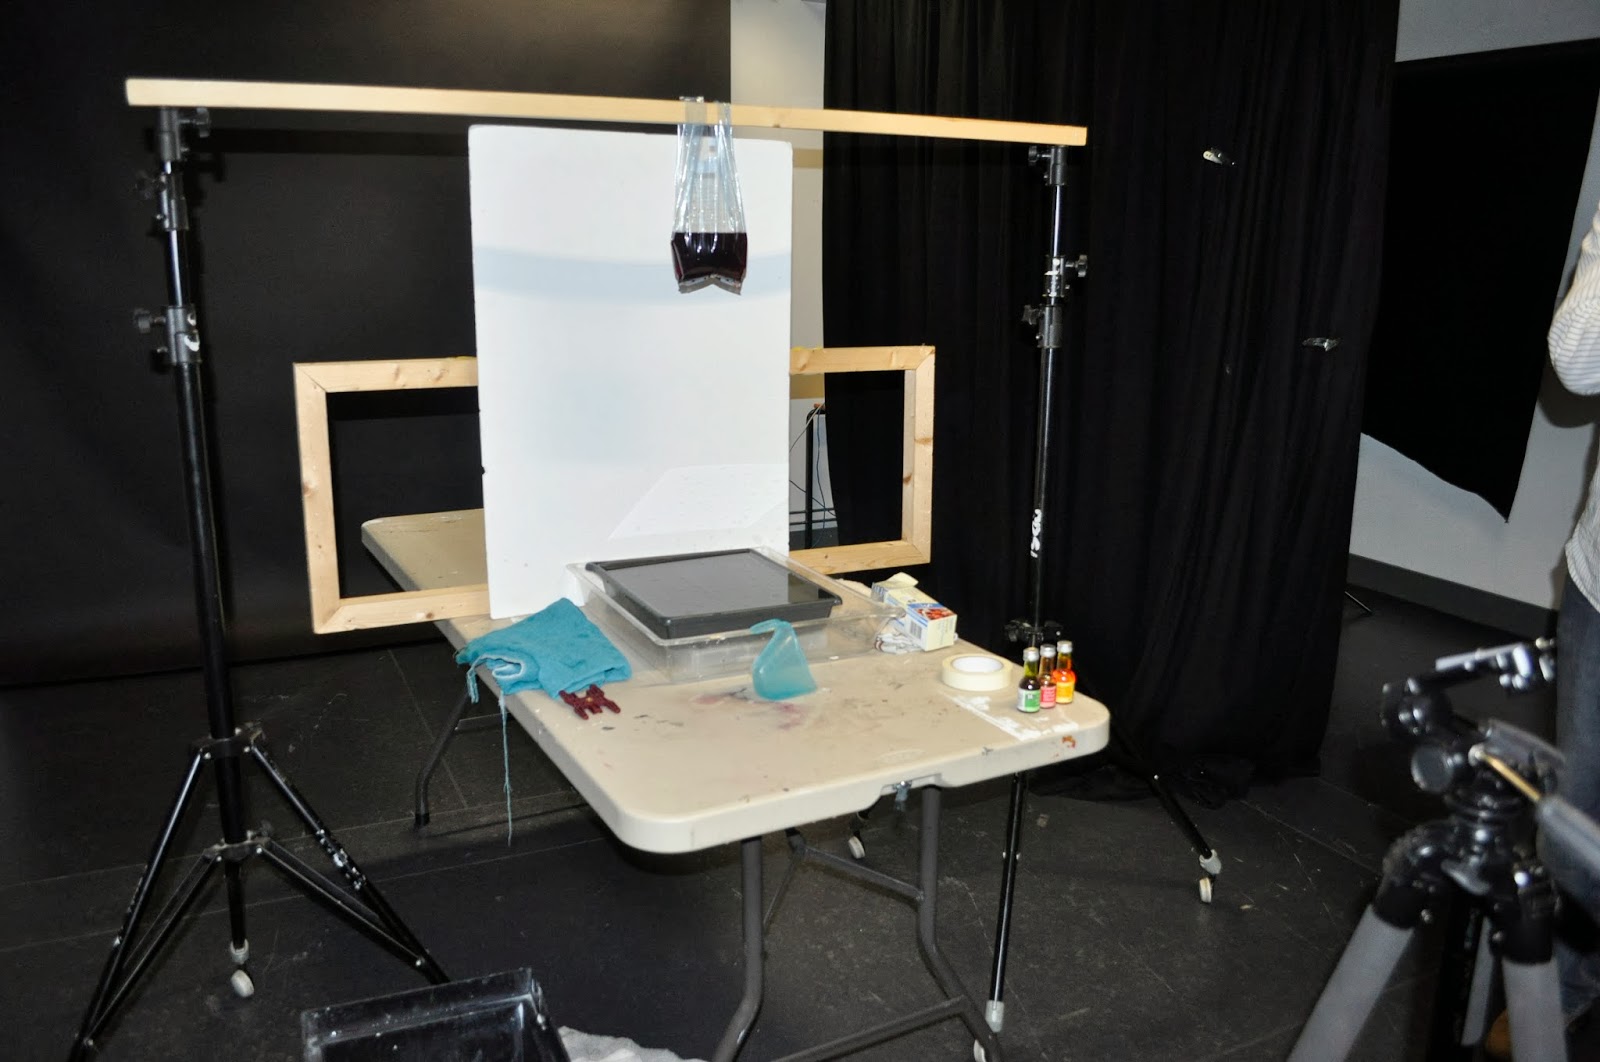
These are a selection of my images which our group was able to produce within the studio during the high speed water droplets shoot. The equipment used is as follows; the freezer bag was used to hold the liquid in which was hung on the pole above the tray of water. We created a small hole at the bottom of the bag to allow the liquid to drip out.
We used a tripod which was positioned so that it was as close as it could be to the water drop so that it would focus. We used tape to stick the paper behind the tray and if we needed to cover the hole up if it came out too quickly.
The flash gun was off camera using a hot shoe attachment. We positioned it so that it pointed towards the backdrop so that it reflected back. We needed to prop it up higher so we put it on a box. A trigger is another useful thing to use so that you don't knock the camera as it captures the movement.
Camera Settings;
ISO - 100
F-Stop - 16
Shutter Speed - 1/250
White Balance - Flash
The ETTL setting on the flash gun works by creating a pre-flash that will automatically measure the light and work out the power for the next flash. If you don't have this setting you need to work it out yourself.


Evaluation;
I feel that this experiment was extremely successful and that our group was able to create some brilliant shots. I have edited the images slightly by cropping them and altering the brightness and contrast. For one of the images I used a preset to change the milk image to another colour.
Once we had worked the timing of capturing the right movement we were able to experiment more which advanced our images. To begin with, we had quite a few images that missed the droplet either before or after.
When editing my images I have experimented with the framing of how I cropped them to see the appearance of them. The majority of the images are central but I have tried to off centre them as well. None of my droplets are the same as it is impossible to capture it again after creating it once, it's like a snowflake.
If I was to try this technique again I would create my own backgrounds on Photoshop rather than using the pre-made ones so that I could choose the colours.
The session was really successful, with one problem which was if we were to move the camera we would have to refocus the camera which was a hard task.
I'm not entirely sure which image I prefer because the colourful images are strong and lead the viewer into the image due to the vibrant colours; however, the black and white images contain nice contrast. I asked peers which they preferred and they said that the colourful images were strong and liked how the colours blurred as ripples were created within the waters movement.